How to setup React, TypeScript, and Tailwind CSS with Vite in a Project
Publicado el: 9/3/2025

In this article, we will set up a coding environment with Vite, React, TypeScript, and Tailwind CSS with their latest versions, so that you can start building your projects right away.
We will use VSCode as our code editor, Node.js(npm) as our package manager and Vite as the development environment.
Step 1 — Create Your Project
In your terminal, create a folder

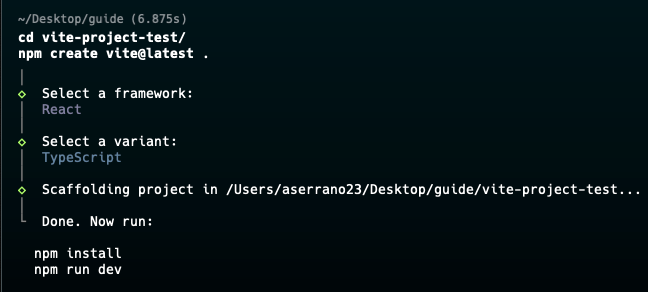
Then, navigate to the folder and enter the command given below:

We are using '.' to install the project inside the folder we are in.
Select framework as React and select TypeScript for the variant.

This will create a template of a vite + react + typescript project.
Now, we need to install the necessary packages, and run the project. So, enter the commands given below in the terminal:

At this stage, your project will be up and running, open localhost:5173 in your explorer to see it:

Step 2 - Install Tailwind CSS 4
First, we need to install the 'tailwindcss' and '@tailwindcss/vite' packages

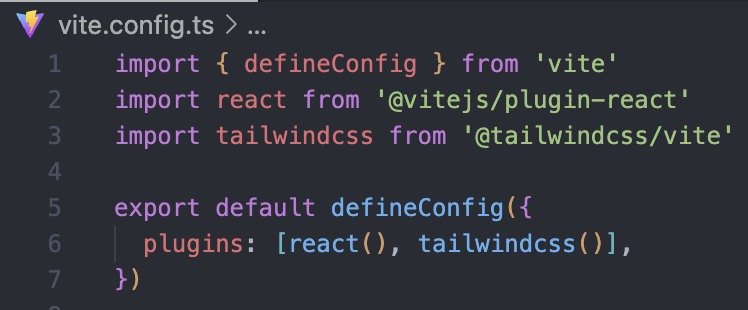
Then, configure the vite plugin, adding the '@tailwind/vite' plugin to your vite configuration(vite.config.ts) (lines 3 & 6):

Import Tailwind CSS, add an '@import' to your CSS file in this case you have to add it in the /src/index.css file.

If you want, you can remove all the css code inside index.css before adding the import, don't care!
Step 3 - Start using Tailwind CSS
Now, we can start using tailwind.
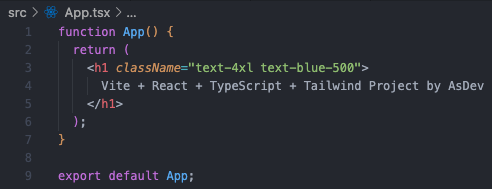
- Open your App.tsx file and remove all the content
- Remove app.css file to see how the tailwind classes affect to the HTML elements
- Now you can use Tailwind CSS classes

Here, I have only returned the h1 element from the App component
Now start your server using

Your webpage will look like this

From here, you can start building your project 🚀
